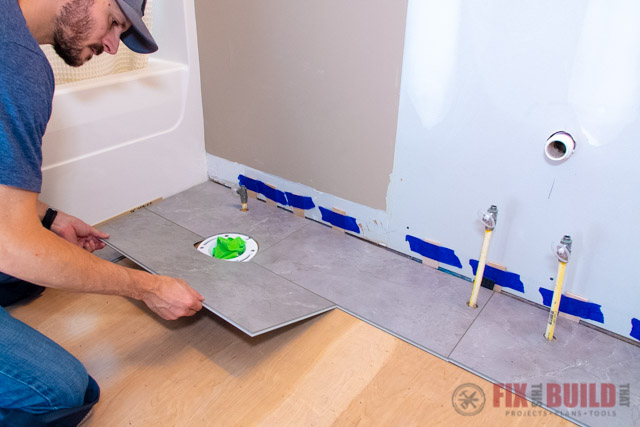
Have you ever tripped over a loose vinyl plank in your kitchen? Or perhaps a curious pet chewed a corner, leaving a gaping hole in your otherwise beautiful flooring? Replacing a damaged vinyl plank might seem intimidating, but it’s actually a fairly straightforward DIY project. With the right tools and a bit of patience, you can have your floor looking good as new in no time.

Image: jjvs.org
This comprehensive guide will walk you through the process of replacing a damaged vinyl plank. We’ll cover everything from identifying the necessary tools to tackling unexpected challenges that you might encounter. By the end, you’ll have the confidence to tackle this home repair project like a pro.
Gathering Your Tools
Before you dive into replacing your plank, make sure you have all the necessary tools. This will streamline your project and prevent frantic last-minute trips to the hardware store.
- New Vinyl Plank: Ensure you match the existing planks. Take a sample along to the store, just in case the exact match isn’t readily available!
- Utility Knife: Used to cut the new plank to size.
- Measuring Tape: Essential for measuring the damaged plank and the new one.
- Tapping Block: A rubber block used to tap the new plank into place.
- Pry Bar: Used for carefully removing the damaged plank.
- Hammer: Need a bit of force to help tap the plank in place.
- Safety Glasses: Always protect your eyes when working with tools.
- Work Gloves: These protect your hands from cuts and splinters.
Removing the Damaged Plank
Now for the fun part: removing the damaged plank. This is where patience and a gentle hand are key.
Step 1: Identify the Surrounding Planks
Carefully examine the surrounding planks. Knowing their positions and how they fit together is crucial for accurate removal and installation.

Image: flooringstype.com
Step 2: Pry Up The Damaged Plank
With the pry bar, gently lift the damaged plank from one edge. Work slowly and carefully, using leverage to loosen the plank, but avoid damaging the surrounding planks.
Step 3: Remove the Damaged Plank
Once the plank is sufficiently loosened, carefully pull it out. You may need to use the pry bar to work around the edges and pull it up completely. It’s best to work with a helper for this step, especially for larger planks.
Installing the New Plank
With the damaged plank out, you’re ready to install the new one. This is the point where your measuring skills become valuable!
Step 1: Measure and Cut the New Plank
Using the old plank as a template, carefully measure and cut the new plank to the exact size. Make sure it fits perfectly into the space before you begin attaching it.
Step 2: Insert the New Plank
Align the new plank with the surrounding planks. With a gentle tap from the rubber block, begin pushing it into place. Ease it into the groove along the sides and into the tongue-and-groove system of the surrounding planks.
Step 3: Secure the New Plank
Once the new plank is in position, tap it firmly with the rubber block to ensure it’s securely attached. Ensure the surface is level and flush with the surrounding planks.
Troubleshooting
Sometimes things don’t go exactly as planned. Here are a few common challenges and how to address them:
- Plank Won’t Fit: If the new plank is slightly too large, try running a utility knife along the edges to trim it down. Be careful, however, as trimming too much can make the plank too small.
- Gaps Remain: If there are small gaps, try tapping the plank more firmly with the rubber block. For larger gaps, you may need to lift surrounding planks to ensure the new plank sits flush.
- Plank Is Loose: If the new plank doesn’t feel secure after installation, try re-tapping it with the rubber block. If it’s still loose, there may be a problem with the surrounding planks.
If all else fails, consult a professional flooring expert.
Beyond Replacement: Protecting Your Vinyl Plank Flooring
The best way to prevent future damage to your vinyl plank flooring is to take preventative measures. Here are some tips to keep your flooring looking its best:
- Use Area Rugs: This will help absorb foot traffic and reduce scratches.
- Use Furniture Pads: Prevent scratches and dents from heavy furniture by placing felt or rubber pads beneath the legs.
- Use a Protective Coating: A sealant or coating can help protect the vinyl from spills and dirt.
- Regular Cleaning: This will remove dirt and dust that can cause scratching. Sweep or vacuum regularly and mop with a mild cleaner.
How To Replace A Piece Of Vinyl Plank Flooring
Conclusion
Replacing a damaged vinyl plank is a relatively simple DIY project that can save you money and breathe new life into your flooring. By following the steps outlined above and taking preventative measures, you can enjoy your vinyl plank flooring for years to come. Remember, if you encounter any unforeseen challenges, it’s always best to seek professional advice. Good luck with your flooring repair!


