Imagine stepping out of bed on a chilly morning, only to find your feet greeted by the comforting warmth of your bathroom floor. No more icy tiles, just a gentle, luxurious heat that envelops you like a hug. That’s the magic of radiant heating floors, and installing them under tile is a surprisingly manageable project for DIY enthusiasts.

Image: www.pinterest.com
This guide is your roadmap to transforming your home with the ultimate comfort upgrade. We’ll break down every step, from choosing the right system to finishing the installation. Get ready to warm up your life!
The Allure of Radiant Floor Heating
Before we dive into the nitty-gritty of installation, let’s appreciate why radiant floors are so desirable. They’re more than just a “nice to have.” They offer several key benefits:
-
Even heat distribution: Unlike conventional heating systems that rely on air circulation, radiant floors heat the entire floor surface, providing a consistent and comfortable temperature throughout the room. This creates a soothing warmth that’s gentler on your body, especially for those with allergies or sensitivities.
-
Energy efficiency: As the heat rises naturally from the floor, radiant heating systems can operate at lower temperatures compared to forced air systems. This results in lower energy consumption and reduced heating costs, a bonus for your wallet and the environment.
-
Enhanced aesthetics: Layered under tile, wood, or stone, radiant floors create a sleek, seamless look. No bulky radiators or vents to clutter up your design. Plus, they can perfectly complement any style, from modern to traditional.
-
Improved air quality: Radiant heating systems naturally eliminate dust and allergens stirred up by forced air systems, fostering a healthier indoor environment, especially beneficial for those with respiratory issues.
Navigating Your Radiant Floor Journey
Installing a radiant floor heating system under tile involves several stages, each crucial to ensure your project’s success. Let’s break them down step-by-step:
1. Planning and Design:
- Define your scope: Identify the specific areas where you want to install radiant heating. This could be an entire room, a section of the floor, or even a specific zone, like a bathroom or kitchen.
- Choose the heating system: The market offers diverse radiant heating systems, each with its pros and cons. Electric heating mats are suitable for smaller areas and offer easy installation. Hydronic systems, which circulate heated water through tubing, are ideal for larger spaces and offer greater energy efficiency.
- Consider the subfloor: The type of subfloor you have will influence your installation options. Concrete floors are ideal for both electric and hydronic systems. Wood subfloors require specific considerations and might need additional insulation.
- Plan the layout: Determine the placement of the heating elements to maximize efficiency. For electric mats, follow the manufacturer’s instructions. Hydronic systems require careful planning to ensure adequate tubing length and layout.
2. Preparation and Installation:
- Install insulation: This is essential for retaining heat and minimizing energy loss. Choose appropriate insulation for your application, whether it’s rigid foam board, foam insulation panels, or reflective insulation. Follow the manufacturer’s guidelines for installation.
- Install the heating system: This step depends on the system you choose.
- Electric heating mats: Unroll the mat carefully, ensuring it covers the desired area. Secure the mat to the subfloor using staples or adhesive tape.
- Hydronic tubing: Install the tubing according to the pre-planned layout. Secure it with staples or clips to the subfloor.
- Install a vapor barrier: This layer prevents moisture from penetrating the subfloor and potentially damaging the heating system. Choose a vapor barrier material suitable for your area and climate.
- Install the tile backing board: This layer provides a stable base for the tile installation and allows for a smooth transition from the heating system to the tile. Select a tile backing board specifically designed for radiant heating systems.
3. Tile Installation and Final Touches:
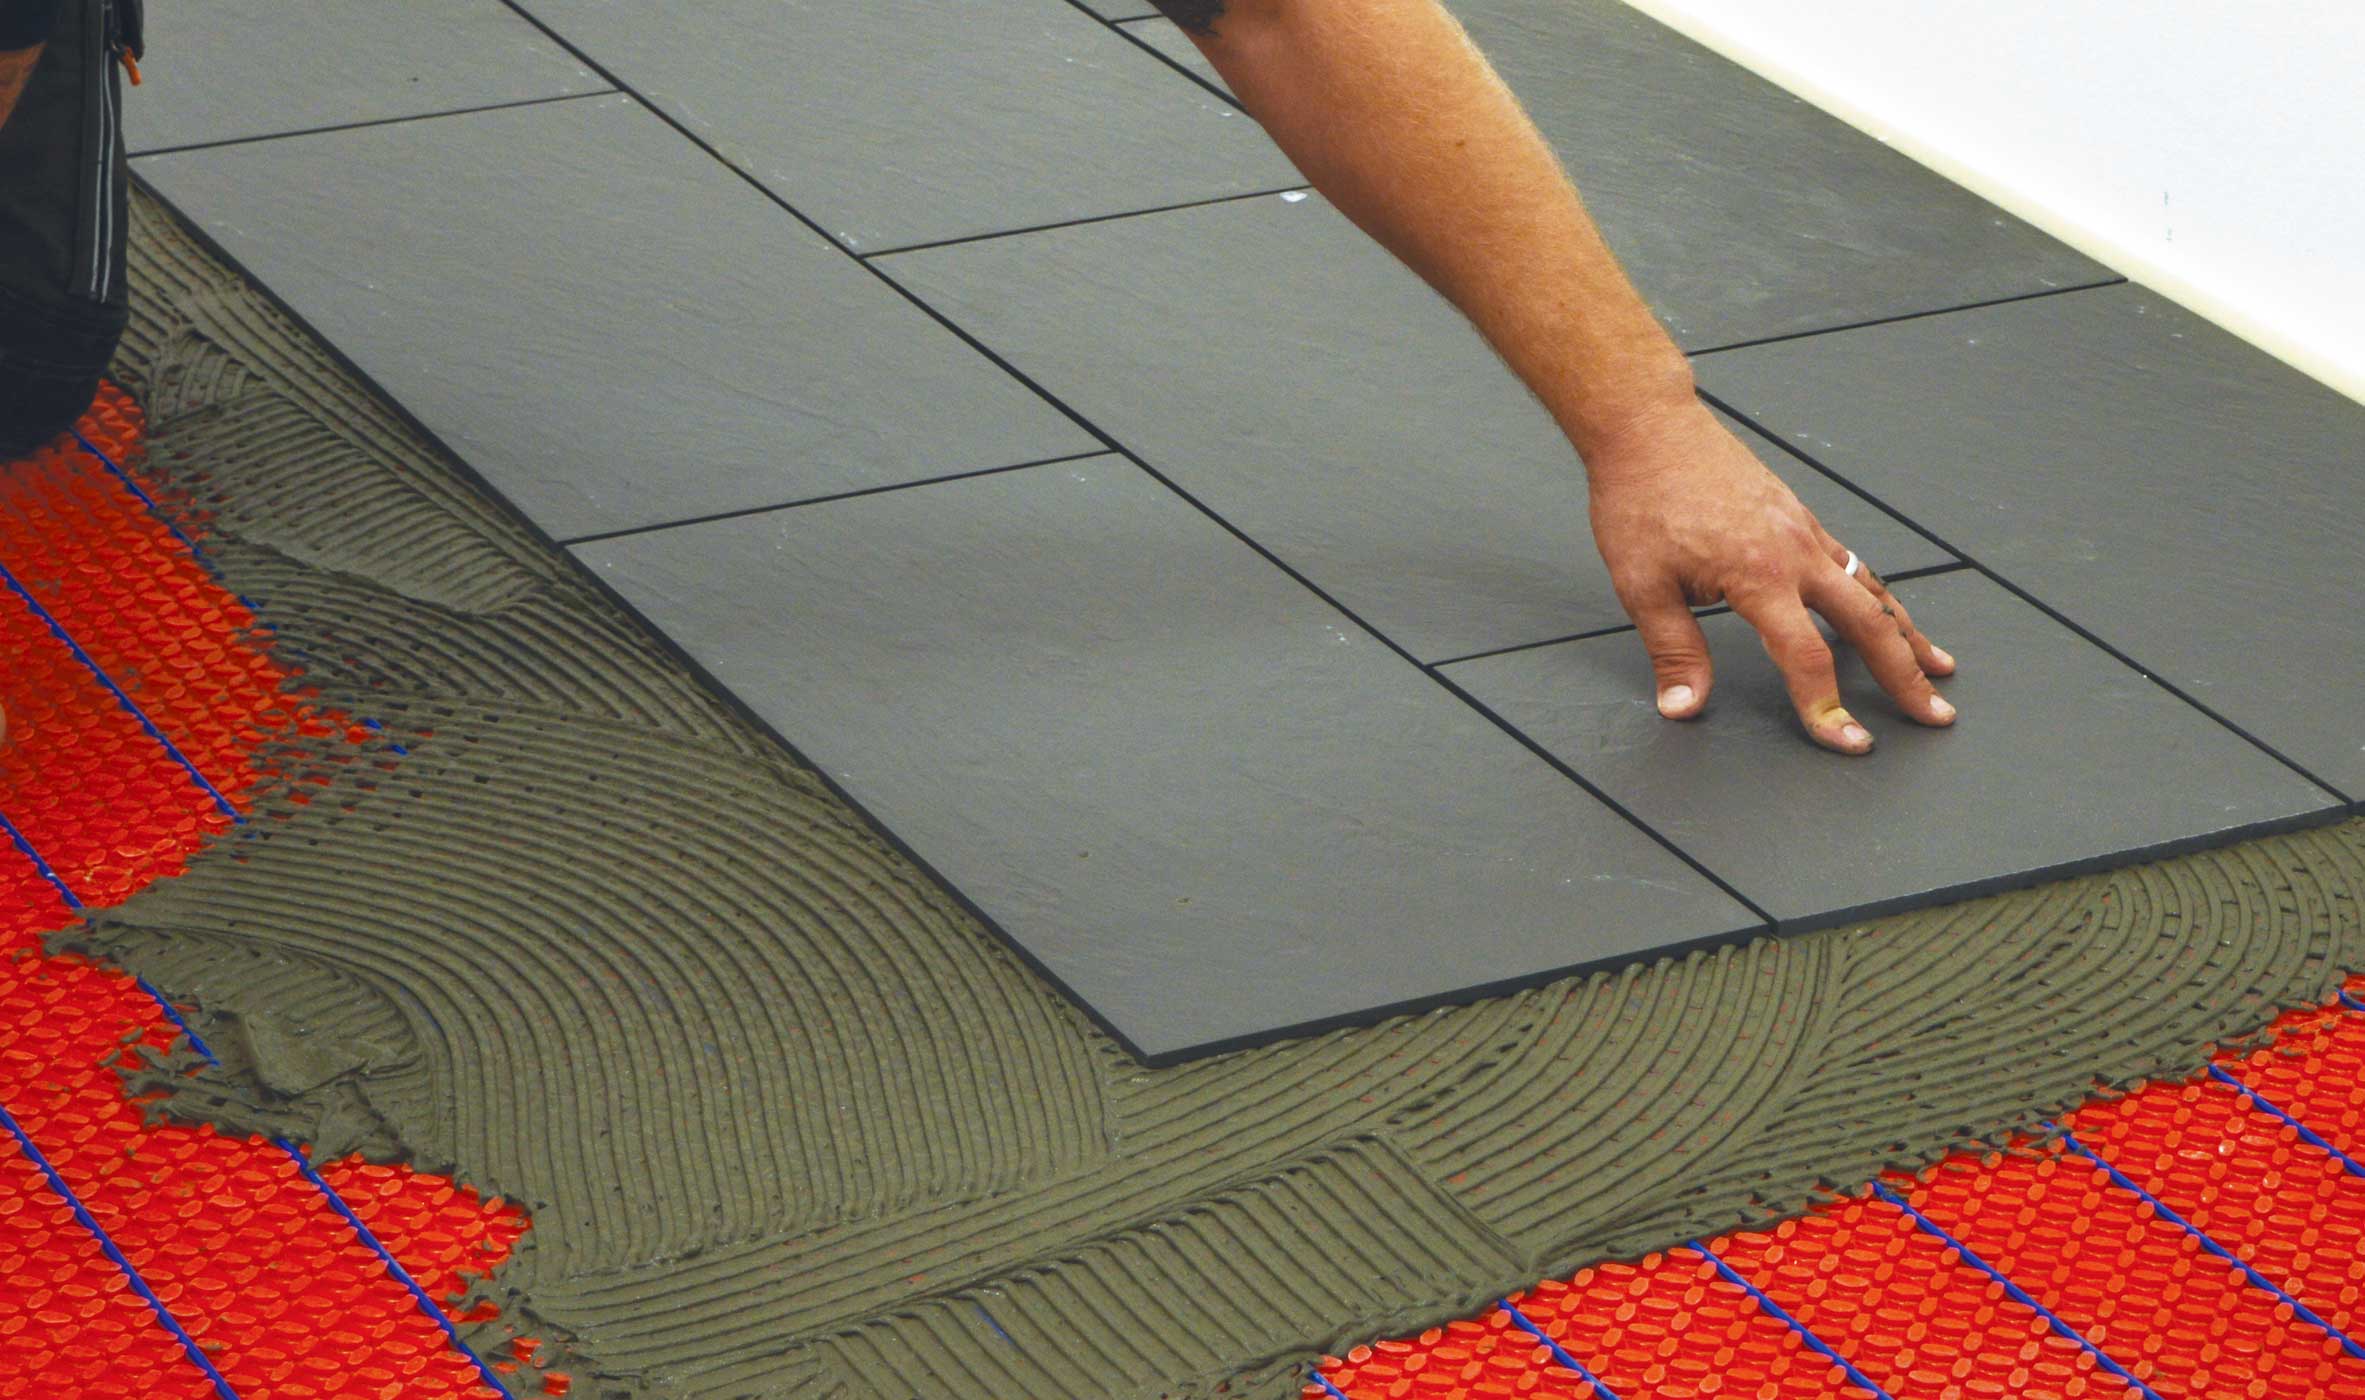
- Install the tiles: Use a mortar specifically designed for radiant heating floors. This mortar will help dissipate heat efficiently and prevent stresses on the system. Follow the standard tile installation procedures, ensuring proper spacing and grout application.
- Grout and seal: Once the tile is installed, apply the grout, allowing it to cure completely. Then, seal the grout to prevent staining and moisture penetration.
- Test and adjust: After installation, turn on the heating system and allow it to run for several hours. Test the temperatures and adjust the thermostat settings as needed to achieve your desired comfort level.
Expert Tips for Success
- Consult an expert: If you’re unsure about any aspect of the installation, don’t hesitate to seek professional guidance. A qualified contractor can provide valuable advice and ensure the project is executed correctly.
- Choose high-quality materials: Invest in high-quality heating system components, insulation, and tile backing board. These materials will ensure a long-lasting and efficient system.
- Allow for proper curing time: Ensure all materials, including the mortar and grout, have ample time to cure completely before using the system. This will prevent cracking and ensure the system works flawlessly.

Image: www.warmup.co.uk
How To Install Heating Floor Under Tile
Embracing a Warm Future
Adding radiant floor heating to your home is an investment in comfort and energy efficiency. With careful planning and precise execution, you can enjoy the luxurious warmth and energy savings for years to come. Embrace the comfort, embrace the future, and say goodbye to chilly floors forever!


