Picture this: you’re finally ready to upgrade your bathroom, transforming it from a drab space to a luxurious oasis. But as you begin your renovation, you encounter a common problem – a damp, uneven concrete floor. Fear not! The solution lies in cement backer board, a sturdy and waterproof material that perfectly prepares your floor for tile installation. This comprehensive guide will equip you with the knowledge and confidence to install cement backer board on your concrete floor like a pro.

Image: www.doovi.com
Cement backer board, also known as tile backer board, is a reliable and essential material for any bathroom or kitchen renovation. It creates a smooth, solid surface that prevents moisture from penetrating the subfloor, protecting your home from rotting, mold, and mildew. By installing cement backer board, you safeguard your investment and create a long-lasting, aesthetically pleasing floor.
Laying the Foundation: Preparing for Success
Before you dive into the installation process, it’s crucial to ensure you have the right tools and materials. This proactive approach will save you time and frustration in the long run. Here’s what you’ll need:
- Cement backer board: Choose a board that’s specifically designed for your project.
- Thin-set mortar: This adhesive will securely bond the backer board to the concrete floor.
- Notched trowel: This tool helps distribute the thin-set mortar evenly across the board.
- Utility knife: Precisely cut the backer board to fit your floor dimensions.
- Tape measure: Accurately measure the area and determine the size of your backer board pieces.
- Level: Ensure a smooth and even surface by verifying the backer board’s alignment.
- Safety glasses: Protect your eyes during the installation process.
- Gloves: Shield your hands from dust and debris.
- Knee pads: If you’re installing a large area, knee pads will ease the strain on your knees.
Step-by-Step Installation Guide:
Step 1: Assess Your Concrete Floor.
Begin by inspecting the concrete floor thoroughly. Look for any cracks, gaps, or uneven spots. If you find any problematic areas, repair them before proceeding to ensure a smooth and solid foundation for your backer board.
Step 2: Clean and Prime the Concrete Floor.
Before applying the cement backer board, it’s important to prepare the concrete floor properly by thoroughly cleaning it. Sweeping or vacuuming can remove any loose debris. Next, use a concrete cleaner or a mild detergent and water to remove dirt, grease, and residues. Allow the floor to dry completely.
For optimum bonding, consider applying a concrete primer. This creates a better surface for the thin-set mortar to adhere to.
Step 3: Measure and Cut the Backer Board.
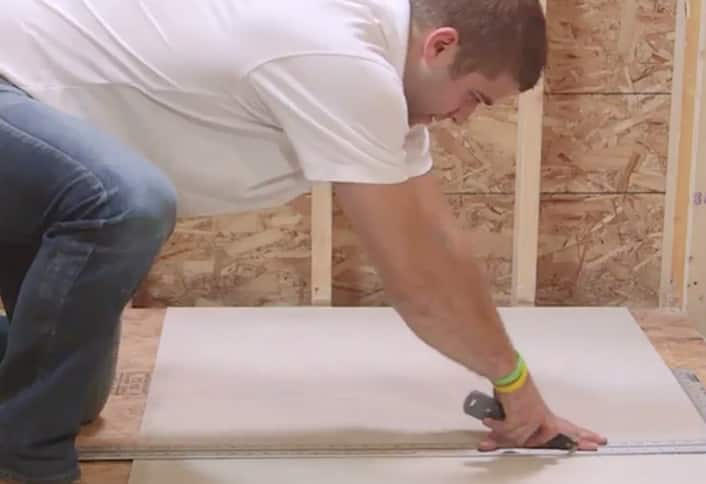
Now, you’ll measure and cut the backer board to fit your floor dimensions. Utilize your tape measure to determine the precise measurements for each piece and mark the backer board accordingly. For accurate cuts, use a utility knife.
Step 4: Apply Thin-Set Mortar to the Backer Board.
Spread a thin layer of thin-set mortar evenly onto the back of a backer board section, using a notched trowel. This ensures a strong and even bond between the backer board and the concrete floor.
Step 5: Position and Secure the Backer Board.
Carefully position the backer board section onto the prepared concrete floor, making sure it’s level. Apply pressure to ensure the mortar adheres tightly to the concrete floor.
Step 6: Repeat Steps 4 and 5 for Remaining Boards.
Utilize the same process to install the remaining backer board sections, meticulously applying thin-set mortar and securing each piece to the floor.
Step 7: Allow Time for Drying.
Let the thin-set mortar fully dry, following the manufacturer’s drying time recommendations. Usually, it takes around 24 hours for the mortar to cure properly.
Step 8: Seal the Seams.
Once the mortar is dry, use thin-set mortar or a specialized sealant to seal any gaps or seams between the backer board sections. This prevents moisture from seeping through, safeguarding your floor and creating a durable surface.
Step 9: Finish with a Final Inspection.
Finally, perform a comprehensive visual inspection of your installed backer board. Ensure all sections are properly secured, any gaps are sealed, and the surface is smooth and level.
Expert Insights and Actionable Tips:
Important:
- Always consult with a professional for specific requirements and considerations based on your project.
- When selecting backer board, choose a product labeled as “waterproof” for optimal protection against moisture.
- Never use a standard drywall compound to seal the seams. This won’t effectively prevent moisture damage.
Expert Tips:
- Always check for and repair any cracks or gaps in your concrete floor before starting the installation process.
- For precise measurements and cuts, use a utility knife.
- Utilize a level to ensure each backer board section is correctly aligned.
- Don’t rush the drying process. Allow for the full curing time of the thin-set mortar. This ensures the board is firmly secured.

Image: www.homedepot.com
How To Install Cement Backer Board On Concrete Floor
Conclusion:
Transforming your space with the installation of cement backer board is a rewarding process, offering a sturdy and dependable foundation for a durable and aesthetically pleasing floor. Remember to follow the step-by-step guidelines, utilize high-quality materials, and focus on achieving a smooth and level surface. Equip yourself with the necessary tools and techniques, and you’ll be well on your way to a seamless transition to a more resilient and stylish floor!


