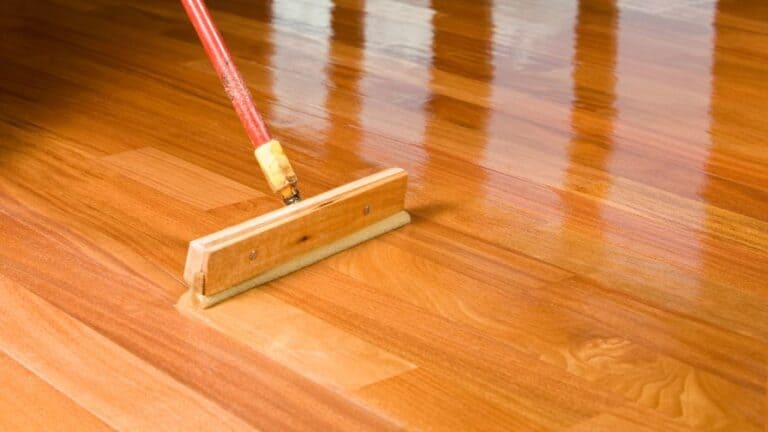
Have you ever gazed upon the gleaming, rich surface of a perfectly finished hardwood floor and thought, “I could do that?” Well, you can. Applying polyurethane to hardwood floors can be a rewarding DIY project, transforming your home’s look and feel. This guide will walk you through the process, from preparation to final coats, empowering you to achieve a stunning, durable finish.

Image: www.thehousewire.com
Applying polyurethane to hardwood floors is more than just slapping on a coat of paint. It requires a methodical approach, careful attention to detail, and an understanding of the materials and techniques involved. Whether you’re dealing with new or existing floors, this guide will equip you with the knowledge you need to get the job done right.
Preparation: The Foundation of Success
Cleaning and Sanding
Before you even think about polyurethane, your hardwood floors need a thorough cleaning. This means getting rid of dust, dirt, grease, and any existing wax or sealant. Once clean, the floor needs to be sanded to create a smooth, even surface that will allow the polyurethane to bond properly. Sanding also helps to remove imperfections and scratches.
Choose the appropriate sandpaper grit based on the condition of your floor. Rougher grits are used for heavily damaged floors, while finer grits are used for finishing. For most DIY projects, you’ll begin with a coarse grit (80-120) and progressively move to finer grits (120-220) for a smooth finish.
Patching and Filling
Before sanding, take care of any gaps, holes, or scratches in the wood. Use wood filler to fill in these imperfections. Wood filler comes in various colors and textures to match different types of wood. After applying, allow the filler to dry completely before sanding it smooth.

Image: topwoodworkingadvice.com
Dust Control
As you sand, dust will fly. This dust contains wood particles that can contaminate the polyurethane and create an uneven finish. Use a shop vacuum with a HEPA filter to remove dust regularly during and after sanding.
Choosing the Right Polyurethane
The type of polyurethane you choose depends on the look and durability you desire. Here are some common options:
- Oil-Based Polyurethane: Offers a beautiful, warm finish with excellent durability. It dries slowly, allowing for more time to work. However, it has a strong odor and requires extensive drying time.
- Water-Based Polyurethane: Environmentally friendly, emits less odor, and dries faster than oil-based polyurethane. It may not be as durable as oil-based but is a good choice for lighter traffic areas.
- Polyurethane with UV Protection: Protects your floors from fading caused by sunlight. Consider this option if your floors are exposed to direct sunlight.
Application Techniques
Once you’ve chosen your polyurethane, it’s time to apply it. Here are some key techniques to ensure a smooth and durable finish:
Brush Application
Using a brush is the most common method for applying polyurethane. Choose a good quality natural bristle brush specifically designed for polyurethane application. Dip the brush into the polyurethane and work in thin, even coats using a “W” pattern, ensuring the entire floor is covered. Avoid dipping the brush too deep, as this can cause bubbles.
Roller Application
For larger areas, a roller can be more efficient. Use a 3/8-inch nap roller for a smooth finish. Remember to use a paint tray to distribute the polyurethane onto the roller without creating excess drips.
Important Tips:
- Keep the polyurethane thin: Thick coats dry slowly and can leave streaks. Multiple thin coats are better than one thick coat.
- Keep things even: Don’t let the polyurethane dry before you’ve covered the entire floor. If you have to stop, don’t worry – apply another thin coat over the dry sections. Just be sure to work wet-on-wet.
- Avoid bubbles: Bubbles are caused by air trapped in the polyurethane. To prevent bubbles, use a brush or roller with a low nap and work in thin, even coats. You can also use a paint scraper to pop any bubbles that do form.
Drying and Finishing
Once the polyurethane is applied, it’s essential to allow it to dry completely. This process can vary depending on the type of polyurethane used, the humidity, and the temperature. Follow the manufacturer’s instructions for the drying time. During the drying phase, ensure adequate ventilation to minimize odor and allow the polyurethane to harden properly.
After the polyurethane has dried, you may need to apply additional coats for extra protection or a deeper finish. Sand lightly between coats using fine-grit sandpaper (180-220) and vacuum thoroughly before applying the next layer.
Maintenance and Care
Hardwood floors are a beautiful investment. Once your polyurethane is applied and dry, you’ll want to keep them looking their best. Here are some tips for maintaining your hardwood floors:
- Sweep or vacuum regularly: Remove dirt and debris to prevent scratches and dullness.
- Use a damp mop: For weekly cleaning, use a damp mop with a wood floor cleaner. Avoid excessive water, as it can damage the wood.
- Protect from scratches: Use furniture pads on the legs of furniture to prevent scratches. Also, avoid dragging heavy objects across the floor.
- Refinish as needed: Over time, your hardwood floors will need to be refinished to maintain their shine and durability. Follow the manufacturer’s instructions for the best results.
How To Apply Polyurethane To Hardwood Floors
Conclusion
Applying polyurethane to hardwood floors is a rewarding project that can transform the look and feel of your home. With proper preparation, the right tools, and a bit of patience, you can achieve a beautiful, durable finish. Remember to choose the right type of polyurethane for your needs, follow the application guidelines carefully, and maintain your floors regularly to keep them looking their best for years to come. And if you ever want to learn more about hardwood floor maintenance, there are a wealth of online resources and professional experts available to answer your questions.


