Have you ever looked at your bare wood floors and wished they had a little more personality? A warm, rich hue, perhaps? Or a cool, sophisticated tone? Staining your wood floors is a fantastic way to add depth, character, and even a splash of personality to your home. It’s a project that can be daunting at first, but with a little planning and patience, anyone can achieve professional-looking results. This guide will walk you through the process, step by step, providing all the tips, tricks, and techniques you need to achieve the wood floor of your dreams.

Image: esbflooring.com
Before we dive into the nitty-gritty details, let’s take a moment to understand why staining wood floors is so popular. Beyond the aesthetic appeal, staining offers a durable finish that protects the wood from scratches, spills, and even foot traffic. This protects your investment and ensures your floors maintain their beauty for years to come. Furthermore, with a wide range of stains available in countless colors and finishes, you can customize your floor to match your personal style and the overall aesthetic of your home.
Preparing for Staining: A Solid Foundation for Success
Just like a painter needs a clean canvas, your wood floors need to be properly prepared before you start applying stain. This step is crucial because it ensures the stain will adhere evenly and produce a beautiful, consistent finish. Here’s a breakdown of the essential preparation steps:
1. Cleaning: A Sparkling Clean Slate
Start by thoroughly cleaning your wood floors. Remove any dirt, debris, grime, or old wax build-up using a good quality wood floor cleaner. Pay special attention to corners, edges, and under furniture where dust and dirt can accumulate. A broom, vacuum, or mopping with a cleaner can all be used, making sure to choose a method suitable for your floor type. Once the floors are clean, allow them to dry completely before moving to the next step.
2. Sanding: Smoothing the Way
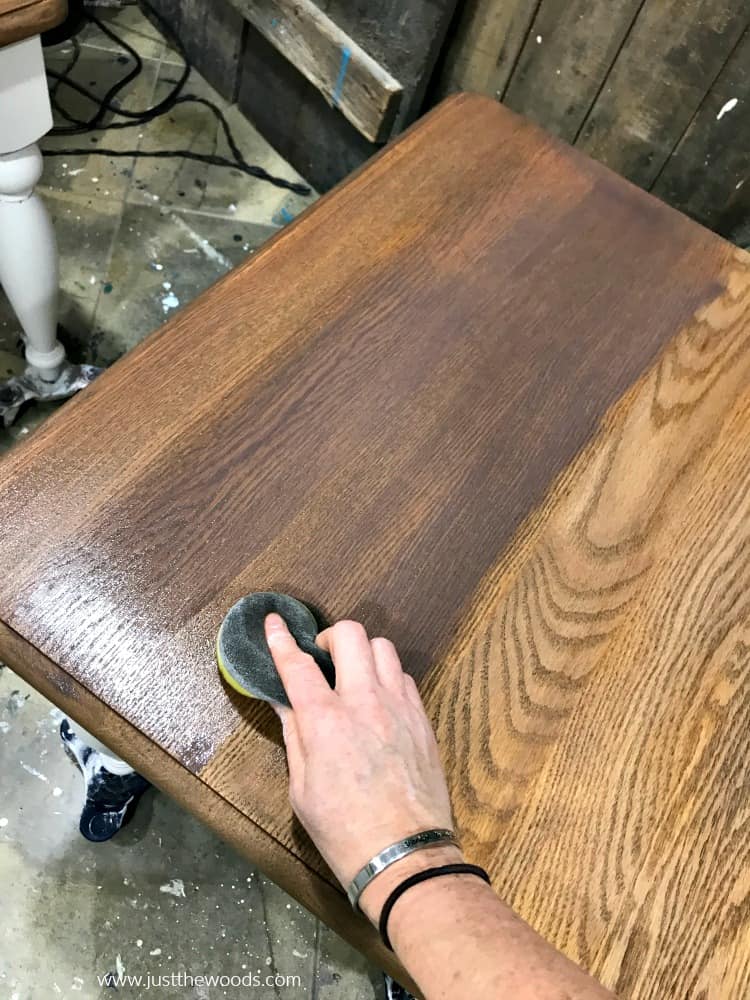
Sanding is an essential step in preparing your wood floors for staining, as it removes old finishes, fills in minor imperfections, and creates a smooth surface that accepts stain evenly. The type of sander used depends on the size and condition of your floors. A drum sander is ideal for large areas, while a belt sander is suitable for smaller areas and edges. For finer sanding, consider using a random orbital sander or a hand sander for touch-ups.
The sanding process involves several stages, each with a specific grit sandpaper. Start with a coarse grit sandpaper (40-60 grit) to remove old finishes and level out any uneven surfaces. Gradually work your way up to finer grits (80-120 grit) to create a smooth finish. Be sure to sand in the direction of the wood grain to avoid creating scratches. Take your time and work in sections, ensuring a smooth, even finish.

Image: www.justthewoods.com
3. Patching: Reconciling Imperfections
If your floors have cracks, holes, or deep scratches, you may need to consider patching them before staining. Wood filler or a specialized wood putty can be used to fill these imperfections. Apply the filler according to the manufacturer’s instructions, let it dry completely, and then sand the patched areas smooth. This ensures a consistent surface for applying the stain.
The Art of Stain Application
Now that your floor is ready, you can begin the exciting and creative process of applying the stain. This step requires a steady hand and attention to detail to achieve a beautifully stained floor. Here’s a step-by-step guide to ensure success:
1. Choosing Your Stain: A World of Color and Finish
Stains come in a dizzying array of colors, from timeless classics like walnut and cherry to bold and modern hues. Before you make your selection, consider the overall look you desire. Are you going for a natural, rustic finish, or a more polished, formal look? Light stains enhance the natural grain of wood, while darker stains create a dramatic effect.
Also think about the finish you want. Some stains are oil-based, while others are water-based. Oil-based stains penetrate the wood deeply and create a rich, vibrant finish. However, they have a strong odor and can take longer to dry. Water-based stains, on the other hand, are less pungent, dry quickly, and are more environmentally friendly. Consider the pros and cons of each type before making your choice. Remember to also choose a stain designed for wood floors, ensuring appropriate protection and durability.
2. Applying the Stain: A Gentle and Precise Approach
With your stain selected and your tools ready, you’re ready to apply the stain. It’s essential to follow a few key principles to achieve the desired results:
• **Start in a well-ventilated area.** Stains can release fumes, and proper ventilation is crucial for safety and to prevent any potential health concerns.
• **Wear gloves and protective clothing.** Stains can stain your clothes and skin, so it’s a good idea to wear a protective outfit and gloves to prevent any unwanted mishaps.
• **Use a brush or cloth applicator.** A brush provides a smooth and even application, while a cloth applicator works well for smaller areas and tight spaces. Choose the approach that suits your comfort level and the size of your project.
• **Apply the stain in thin, even coats.** Don’t overdo it! Thick coats of stain can lead to uneven colors and blotchiness. Instead, apply thin layers, working in the direction of the wood grain.
• **Wipe off excess stain.** This will help eliminate any streaks, globs, or uneven application. The manufacturer’s instructions will usually provide recommended time frames for wiping off the stain for your specific product.
• **Let the stain dry completely.** The drying time can vary depending on the type of stain and local temperature and humidity. Allow ample time for the stain to dry thoroughly before proceeding to the next step.
3. The Finishing Touches: Protecting Your Investment
Once the stain has dried, it’s time to seal and protect your floor. The type of sealant you choose will depend on how much protection and luster you desire. Here are a few popular options:
• **Polyurethane:** A classic choice, polyurethane is durable, protects against scratches and spills, and offers a range of sheens from matte to gloss.
• **Varnish:** Provides a protective finish with a high-gloss sheen, but it can be more difficult to apply evenly.
• **Oil-based sealant:** Offers a natural, low-sheen look and enhances the wood’s beauty.
• **Water-based sealant:** Faster drying, low odor, and environmentally friendly.
Just as with the stain, apply the sealant in thin, even coats, allowing each coat to dry completely before applying the next. Pay attention to the manufacturer’s instructions, as they will provide details about drying times and application techniques for your chosen sealant.
Tips and Tricks for a Perfect Stain Job
Here are some extra tips to help you achieve professional-looking results:
• **Test your stain on a scrap piece of wood:** This will help you see how the color will look on your floors and ensure you’re happy with the shade before committing to the whole project.
• **Use a light touch when applying stain.** Applying too much stain can lead to uneven color and blotchiness.
• **Work in small sections.** This will help you keep track of your progress and ensure even application.
• **Use a clean brush or cloth applicator for each coat.** This will help prevent streaks and uneven application.
• **Let the stain dry completely before applying sealant.** This will prevent the stain from being lifted or muddied by the sealant.
The Final Touch: Cleaning and Care
Congratulations, you’ve successfully stained your wood floors! Now, to keep them looking their best, here’s a few maintenance tips to keep in mind:
• **Regularly vacuum or sweep your floors.** This will remove dirt and debris before it gets embedded in the finish.
• **Clean up spills immediately.** Stains and spills can damage the finish, so it’s important to clean them up as soon as possible.
• **Use a cleaning solution specifically designed for wood floors.** Harsh chemicals can strip the finish and damage the wood, so it’s important to use a gentle cleaner.
• **Apply a fresh coat of sealant every few years.** This will help protect your floors and keep them looking their best.
How To Apply Stain To Wood Floor
https://youtube.com/watch?v=i8nC6EGzXnA
Conclusion: Transform Your Space with Confidence
Staining your wood floors is an excellent way to add personality and value to your home. By following the steps outlined in this guide, you can achieve professional-looking results and enjoy the beauty of your newly stained floors for years to come. Remember, patience and attention to detail are key to a successful stain job. So, roll up your sleeves, get your tools ready, and let your creativity shine as you transform your space with the unique character of stained wood floors.


