
Imagine walking into your newly renovated home, where the floor flows seamlessly from room to room, creating a sense of spaciousness and elegance. No awkward transitions, no tripping hazards, just a unified, beautiful floor. Now, what if I told you that achieving this seamless look is possible without the need for those clunky transition strips? That’s right, you can install vinyl plank flooring without transitions, and it’s easier than you might think.

Image: dragon-upd.com
This guide dives deep into the world of vinyl plank flooring installation, shedding light on the techniques and considerations for achieving that seamless, modern look without compromising on durability or aesthetics. We’ll explore the benefits of this approach, guide you through the installation steps, and equip you with the knowledge you need to create a flooring masterpiece in your own home.
Understanding the Basics: Subfloor Preparation is Key
Before embarking on your seamless flooring journey, it’s crucial to lay the groundwork for success. Vinyl plank flooring, while incredibly versatile, requires a solid foundation to perform its best. This means prepping your existing subfloor is non-negotiable.
First things first, assess your subfloor. Is it level? Any dips or bumps can create unevenness in your finished floor, defeating the purpose of a seamless finish. Use a level and a straight edge to identify any deviations. For slight imperfections, you can level the subfloor using self-leveling compound. For more significant issues, you might have to consider replacing damaged sections with plywood or OSB.
Next, check for moisture. Vinyl plank flooring is susceptible to moisture damage, so it’s essential to ensure your subfloor is adequately dry. Use a moisture meter to test the subfloor’s moisture content. If the readings exceed the manufacturer’s recommendations for your specific vinyl plank flooring, you’ll need to take steps to address the moisture issue. This may involve improving ventilation, addressing leaks, or using a moisture barrier.
Choosing the Right Vinyl Plank Flooring: Seamlessly Beautiful
Once your subfloor is prepped and ready, it’s time to pick your vinyl plank flooring. When installing without transitions, choose a flooring that can seamlessly transition between different rooms or areas. Here are some key considerations:
Click-lock System: Click-lock vinyl planks offer a simple, convenient, and secure installation method. They feature a tongue-and-groove design that allows the planks to click together, forming a strong bond without the need for adhesive.
Matching Colors and Patterns: For a truly seamless look, ensure that you select vinyl planks with matching colors and patterns throughout your entire flooring project. This includes choosing a consistent plank width and length for consistency.
Thickness: Consider the thickness of the vinyl planks. For seamless transitions, a consistent thickness is essential, as it helps avoid uneven edges and creates a smooth flow between rooms.
Wear Layer: Opt for vinyl plank flooring with a durable wear layer, as it will contribute to the longevity and resilience of your floor.
Mastering the Art of Seamless Installation: Step-by-Step Guide
Now, let’s delve into the heart of this guide: installing vinyl plank flooring without transitions.
1. Measure and Acclimate: Before you start, measure your space accurately and calculate the number of planks you’ll need, accounting for waste. Remember to acclimate the vinyl planks to the room’s temperature and humidity for at least 24 hours before installation. This helps prevent warping and expansion issues.
2. Start by Laying the First Row: Begin in the corner of the room where the floor receives the most natural light, installing the first row of planks along the wall. Ensure the first row is perfectly straight and aligned using a level and a spacer.
3. Securely Interlock Each Plank: Position the planks carefully, ensuring the tongue of each plank fits securely into the groove of the previous one. You’ll hear a distinct “click” sound as the planks lock together. The click-lock system creates a strong and durable bond.
4. Work Your Way Across the Room: Continue laying planks in rows, ensuring they are perfectly aligned with the previous row by using a spacer and a level. Apply pressure to ensure the planks are firmly interlocked.
5. Trim and Cut as Needed: As you approach walls or other obstacles, use a utility knife or a saw to carefully trim the planks to fit. Use a measuring tape and a pencil to mark the cutting lines precisely.
6. Transitioning Between Rooms: For seamless transitions between rooms, carefully measure and cut the planks to fit precisely. The goal is to create a smooth, even surface without any noticeable gaps or offsets.
7. Utilize Expansion Gaps: Leave an expansion gap of approximately 1/4 inch around the perimeter of the room, allowing for the expansion and contraction of the vinyl planks due to changes in temperature and humidity.
8. Installation in Areas with Different Floor Heights: If you’re transitioning between rooms with different floor levels (e.g., between a kitchen and a living room), use a special transition tool to create a subtle slope, ensuring a smooth and safe transition.
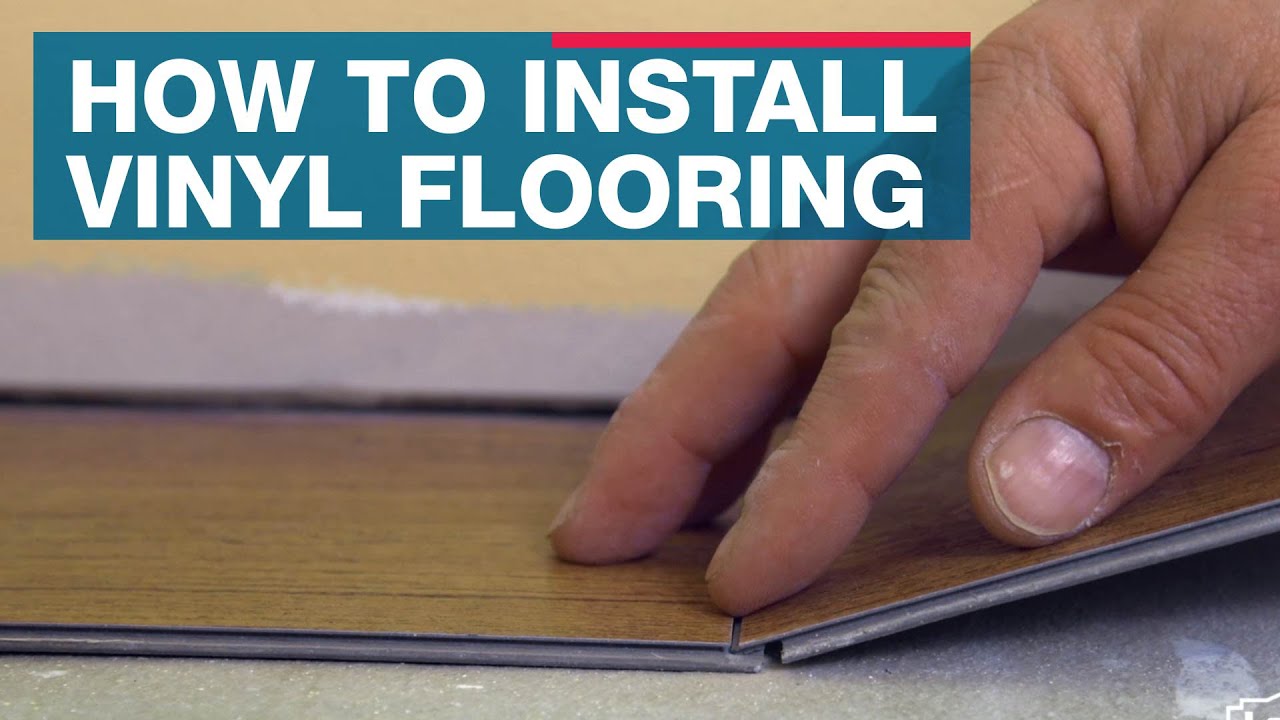
Image: www.youtube.com
Expert Tips for a Seamless and Stunning Finish
Here’s a pro’s touch to help your installation shine:
Consult a Professional: For intricate installations or complex layouts, don’t hesitate to consult a professional flooring installer. Their expertise will ensure a flawless and durable finish.
Utilize Transition Strips Strategically: For situations where transitions are unavoidable, opt for transition strips that blend seamlessly with your flooring. These strips can help create a smooth transition between different flooring types.
How To Install Vinyl Plank Flooring Without Transitions
Conclusion: Unlocking the Beauty of a Seamless Floor
By meticulously prepping your subfloor, selecting the right vinyl plank flooring, and following the step-by-step guide outlined above, you can achieve a stunning, seamless flooring installation without the need for transitions. Remember, precision, patience, and attention to detail are key to creating a flooring masterpiece that will transform your home. So, go ahead, unleash your inner DIY enthusiast, and embrace the beauty of a seamless floor. Your home will thank you for it.


