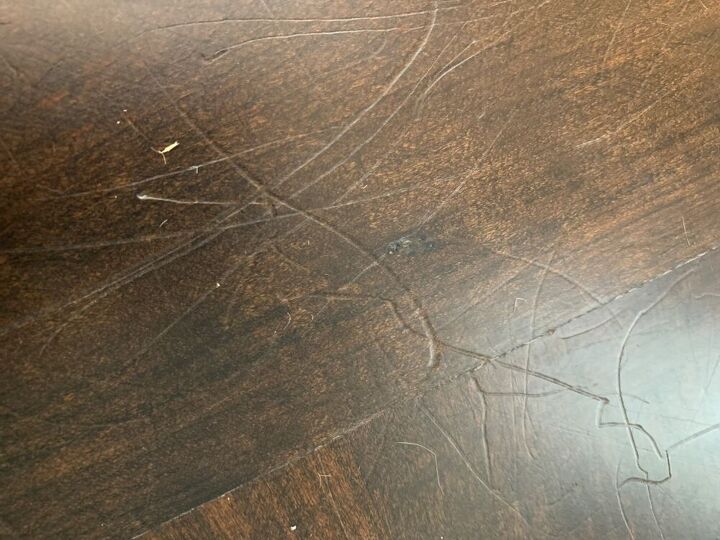
Picture this: You’ve just finished cleaning your beautiful hardwood floors, the sunlight streaming through the windows, making them gleam. Then, you hear a loud thump and a horrifying screech. Your dog, a furry whirlwind of love and chaos, has just decided to test the durability of your floor with his claws, leaving behind a trail of unsightly scratches. It’s a scene familiar to many dog owners, leaving us heartbroken, frustrated, and wondering – can we restore our floors to their former glory?

Image: www.hometalk.com
Don’t despair! While dog scratches can seem daunting, there are several solutions to repair the damage and bring back your hardwood floor’s shine. This guide explores the depths of dog scratch removal, offering practical tips and expert advice to help you conquer this common problem and restore the beauty of your home.
Understanding the Enemy: Dog Scratches and Hardwood Floors
Hardwood floors, with their timeless elegance and durability, are a popular choice for many homes. However, their beautiful surface can be susceptible to wear and tear, particularly from the playful paws of our canine companions. Understanding the nature of dog scratches is crucial for choosing the right repair method.
Dog scratches vary in severity depending on the breed, size, and nail condition of your furry friend. Small scratches, often barely visible, might just need a light sanding and stain to disappear. However, deep scratches that reach the wood’s core might require more extensive repair, such as wood putty or replacement boards.
The Art of Disguise: Minor Scratch Removal Techniques
For those shallow scratches that are more of an eye sore than a major issue, several simple methods can effectively camouflage them:
1. The Magic of Wood Floor Polish
A simple and often effective solution is using a good quality wood floor polish. The polish’s oils and waxes can fill in shallow scratches, minimizing their visibility and restoring the floor’s natural sheen. For best results, choose a polish specifically designed for your hardwood floor type and follow the manufacturer’s instructions for application.

Image: thewoodweb.com
2. The Power of Stain Pens
Stain pens, readily available at hardware stores, act like tiny artists, filling in scratches with color matching your existing floor. They are particularly useful for darker wood floors where minor imperfections are more noticeable. To achieve a seamless effect, follow the pen’s instructions carefully, applying even pressure and avoiding over- application.
3. The Gritty Truth: Sanding Away Scratches
For scratches that require a more aggressive approach, sanding is a viable option. Always use fine-grit sandpaper, starting with a higher number like 120-grit and gradually increasing to 220-grit for finishing. This process helps remove the scratch along with the surrounding surface, creating a smooth, even texture.
Remember, sanding can lighten the wood’s color, so use it sparingly and test it in an inconspicuous area first. After sanding, apply a fresh coat of finish to seal the wood and enhance its shine.
Facing the Deeper Scratches: Advanced Repair Techniques
When dealing with those deep, gouging scratches that reach the wood’s underlayers, more intricate repair techniques become necessary.
1. The Art of Wood Putty: Filling the Gaps
Wood putty is a versatile material designed to fill in gaps and imperfections in wood. It comes in various colors, allowing you to match your floor’s existing hue. Apply the putty with a putty knife, pressing it firmly into the scratch and leveling it with the surrounding surface. Once the putty dries, sand it smooth and apply a finish.
2. The Power of Wood Patching: Replacing Damaged Sections
For severe scratches that go beyond simple filling, wood patching is a more extensive solution. It involves cutting out the damaged section and replacing it with a new piece of wood. This process requires some DIY skills and precision. But with the right tools and patience, you can achieve professional results.
If you’re not comfortable with this level of repair, it’s always wise to consult a professional flooring specialist for expert advice and assistance.
Expert Insights: Tips for Preventing Future Damage
Once you’ve conquered the scratches, it’s important to prevent them from returning. Here’s what the pros suggest:
1. Invest in Nail Trimming: Keeping Claws in Check
Regular nail trimming is essential for maintaining your dog’s health and your floors’ safety. Train your dog to get accustomed to nail trimming sessions, making it a positive experience. This way, you can prevent those sharp claws from digging into your precious hardwood.
2. Protect Your Flooring: The Benefits of Area Rugs
Area rugs serve as a protective barrier, shielding your hardwood floors from everyday wear and tear, particularly in high-traffic spots. Choose durable rugs made from materials like wool or jute, providing a soft yet resilient cushion for your dog’s paws.
3. Don’t Let Accidents Happen: Floor Protections
Accidents happen, and spilled liquids can cause damage to hardwood floors. Invest in a good quality floor protector, applying it to your floors to create a protective layer against stains and scratches. Regular cleaning and maintenance ensure the protector’s effectiveness, safeguarding your floor’s integrity.
Can You Remove Dog Scratches From Hardwood Floors
Conclusion: A New Lease on Life for Your Hardwood Floors
Dog scratches, though a common occurrence, don’t have to be a cause for despair. With the right knowledge and techniques, you can effectively camouflage minor scratches and repair deep gouges. Remember that prevention is key, so keep those claws trimmed, protect your floors with rugs and a good quality floor protector, and enjoy harmonious cohabitation with your furry friend! So go ahead, unleash your inner DIY expert and reclaim the pristine beauty of your hardwood floors.


