Have you ever stared at your concrete floor, dreaming of a warmer, more inviting space? Perhaps you envision elegant wood-look laminate flooring, but worry about the complexities of installation over concrete. Rest assured, your dream is achievable. In this comprehensive guide, we’ll demystify the process of laying laminate flooring over cement, exploring the intricacies, considerations, and best practices to ensure a successful and stunning transformation.

Image: www.trendradars.com
Installing laminate flooring over cement is a common and rewarding project for homeowners. It offers a beautiful and durable alternative to traditional hardwood or tile, while often being more affordable. Understanding the process involves navigating the intricacies of subfloor preparation, proper underlayment selection, and the specific techniques required for installation. Whether you’re a seasoned DIY enthusiast or a novice homeowner, this guide will equip you with the knowledge to confidently embark on this flooring transformation.
Why Laminate Flooring Over Cement?
The appeal of laminate flooring over cement goes beyond aesthetics. It offers a range of benefits, making it a popular choice for many homeowners:
- Cost-Effective: Laminate flooring is generally more budget-friendly than hardwood or tile, making it an attractive option for those seeking a stylish yet affordable upgrade.
- Durability: Laminate flooring is renowned for its resilience. It can withstand heavy foot traffic, making it ideal for high-traffic areas of your home.
- Ease of Maintenance: Laminate flooring is incredibly easy to clean and maintain. A simple sweep or mop is often all it takes to keep it looking pristine.
- Wide Variety of Styles: Laminate flooring comes in a vast array of styles, from classic wood looks to contemporary designs, allowing you to perfectly match your home’s aesthetic.
Essential Preparations: The Foundation for Success
For a flawless laminate flooring installation over cement, meticulous preparation is key. Neglecting this step can lead to uneven floors, squeaking, and an overall subpar result. Here’s a comprehensive guide to ensure a solid foundation:
1. Assess Your Concrete Slab:
The condition of your concrete slab directly impacts the success of your project. Before starting, inspect the surface for any imperfections:
- Cracks: Minor cracks can be filled with a suitable epoxy sealant. Larger cracks require professional repair.
- Unevenness: Significant unevenness can be addressed using a self-leveling compound to create a smooth, even surface.
- Moisture: High moisture levels in your concrete slab can lead to warping and damage to your laminate flooring. Ensure your slab meets the required moisture vapor retarder (MVR) levels.

Image: viewfloor.co
2. Cleaning and Priming:
A clean and primed concrete surface is essential for proper adhesion. Begin by thoroughly cleaning your concrete slab, removing any debris, dirt, or grease. Priming with a moisture-resistant sealant will enhance adhesion and prevent moisture from reaching your laminate flooring.
3. Underlayment: Your Flooring’s Protective Shield
Underlayment serves as a vital buffer between your concrete slab and your laminate flooring, offering multiple benefits:
- Sound Insulation: Reducing noise transmission from foot traffic or objects dropping on the floor.
- Moisture Barrier: Protecting your flooring from moisture that may seep through the concrete.
- Shock Absorption: Providing cushioning for a more comfortable feel and reducing the risk of damage to the laminate flooring.
- Floor Leveling: Addressing minor imperfections in the concrete slab.
Different types of underlayment are available, each with specific properties and benefits. Choose your underlayment based on the needs of your project and your desired level of soundproofing and moisture protection.
4. Choosing the Right Laminate Flooring:
With the subfloor prepped and underlayment selected, it’s time to choose the right laminate flooring. Consider these factors for your decision:
- Thickness: Thicker laminate flooring provides a more robust and stable surface. However, it can also be more challenging to install, especially over uneven concrete.
- Wear Layer: The wear layer refers to the protective coating on the top of the laminate plank. A thicker wear layer offers greater resistance to scratches and abrasions, making it ideal for high-traffic areas.
- Click-Lock System: The click-lock system is the most common installation method for laminate flooring. It features a tongue and groove design that allows planks to easily interlock, creating a seamless surface.
Installation: Step-by-Step Guide
Now that your subfloor is prepared, underlayment installed, and laminate flooring selected, you’re ready to begin the installation process. Here’s a step-by-step guide:
1. Laying the First Row:
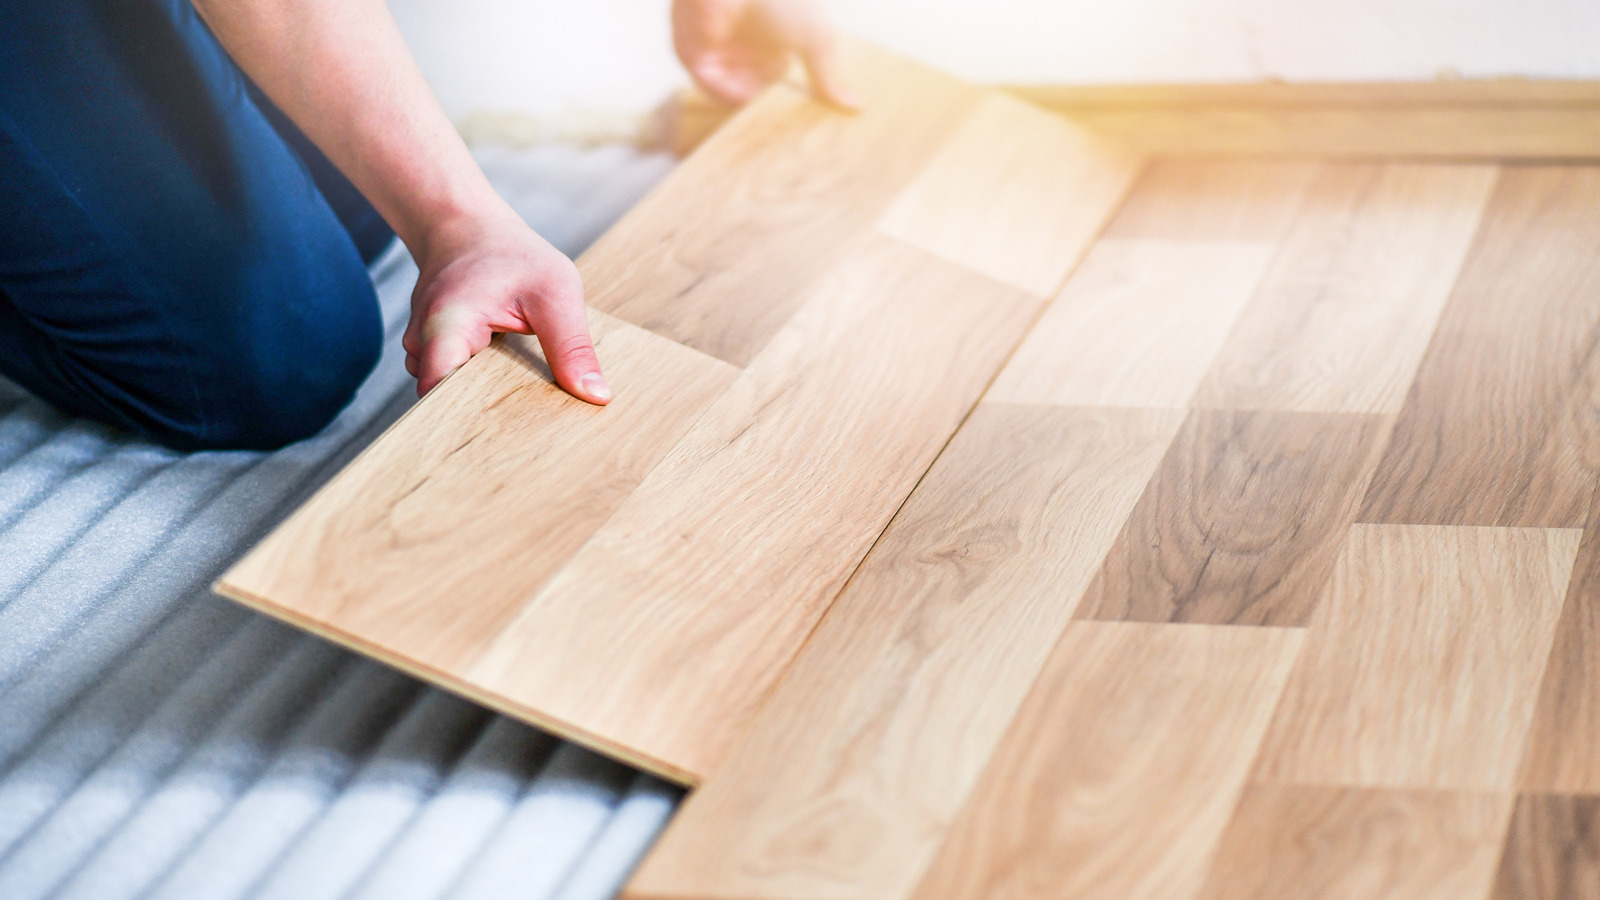
Start by laying the first row of laminate planks along the longest wall of your room. Make sure the planks are flush against the wall, but leave a small gap, called an expansion gap, between the flooring and the wall. This gap will allow for expansion and contraction of the flooring as temperatures fluctuate.
2. Interlocking the Planks:
Use the click-lock system to join the laminate planks together. Each plank features a tongue and groove design. Position the tongue of one plank into the groove of the previous plank, applying pressure until you hear a click. Maintain a consistent expansion gap on the sides of the planks as you work.
3. Cutting Planks:
You’ll need to cut laminate planks to fit around obstacles or corners. A good-quality saw or a laminate flooring cutter will make this easier. Be sure to make clean cuts for a neat finish.
4. Installing Around Obstacles:
When installing around obstacles like doors or pillars, ensure the laminate planks are cut precisely to fit. Use the right tools and techniques for accurate cutting to avoid gaps or visible seams.
5. Finishing Touches:
Once you’ve laid all the planks, install transition strips or T-molding to create a seamless transition between the laminate flooring and other flooring types in your home.
Troubleshooting and Maintenance
Even with the best preparation and installation, you might encounter some challenges or require regular maintenance. Here’s what you should know:
Troubleshooting:
- Uneven Flooring: If your flooring feels uneven after installation, you may have missed leveling imperfections in the subfloor. Consider re-evaluating your subfloor preparation.
- Squeaking: Squeaking can occur if your underlayment is not properly installed or if the laminate planks are not securely interlocked. Re-examine the installation and tighten any loose connections.
- Gaps or Seams: Gaps or seams between planks may indicate improper cutting or installation. Verify the installation technique and make adjustments if needed.
Maintenance Tips:
Proper care extends the life of your laminate flooring. Here are essential maintenance tips to keep it looking its best:
- Regular Cleaning: Sweep or vacuum regularly to remove dust and debris. Use a damp mop with a mild cleaner for deeper cleaning.
- Avoid Excess Moisture: Laminate flooring is not waterproof, so avoid using excessive water when cleaning. Spills should be cleaned up promptly.
- Protect from Scratches: Place furniture pads under heavy pieces to prevent scratches and dents.
- Avoid Abrasive Cleaners: Use a mild cleaning solution designed for laminate flooring. Avoid harsh chemicals or cleaners.
Can You Put Laminate Flooring Over Cement
Conclusion: A Beautiful Transformation
Laying laminate flooring over cement can transform your home, bringing warmth and style to your living spaces. By following these steps and paying close attention to detail, you can enjoy a beautiful and durable flooring solution. Remember, proper preparation, installation, and maintenance are key to maximizing the longevity and beauty of your laminate flooring. With the right knowledge, you’re equipped to tackle this rewarding project, turning a concrete floor into a space that reflects your desired style and comfort.


