
Have you ever looked at a beautifully installed floating floor and wondered how it all comes together? While the name “floating floor” evokes a sense of lightness and freedom, the installation process requires careful consideration and a certain level of precision. The question of whether you can nail down a floating floor is one that often arises, and it’s important to understand the intricacies of this type of flooring before attempting any installation.

Image: uooz.com
A floating floor, as the name suggests, isn’t actually fixed to the subfloor. It rests on a layer of underlayment, creating a slight gap between the floor and the subfloor. This gap allows for expansion and contraction due to changes in temperature and humidity, which is crucial for preventing warping and buckling of the flooring. So, to answer the question directly, no, you cannot nail down a floating floor. Doing so would compromise its ability to move freely and could lead to damage.
Understanding the Mechanics of Floating Floors
The Underlayment: The Unsung Hero
Underlayment plays a vital role in the successful installation of a floating floor. It acts as a cushion between the flooring and the subfloor, absorbing sound and providing a more comfortable walking experience. Common types of underlayment include foam, cork, and rubber, each offering distinct benefits depending on the desired level of cushioning and sound absorption. The type of underlayment chosen directly impacts the overall performance of the floating floor.
Click-and-Lock Systems: A Precision Fit
Most modern floating floors utilize a click-and-lock system for installation. These boards are designed with interlocking edges that fit snugly together, creating a tight and secure bond without the need for adhesives or nails. With careful alignment and proper installation techniques, these systems provide a durable and aesthetically pleasing finish. While they offer the convenience of a DIY approach, precision is key for a successful and long-lasting floor.
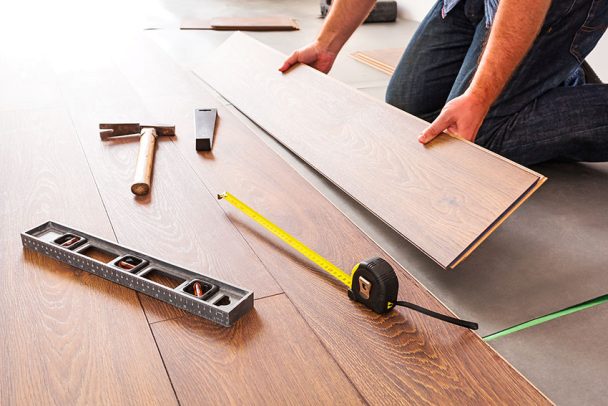
Image: designingidea.com
Floating Floor Installation: A Step-by-Step Guide
1. Preparing the Subfloor: A Smooth Canvas
The subfloor is the foundation for your floating floor, and it needs to be perfectly smooth and level before installation. Any unevenness or imperfections will transfer to the finished floor, leading to a less-than-desirable outcome. Fill in any gaps or cracks, and sand down any bumps or ridges. The subfloor must be free of moisture and debris for optimal performance.
2. The Importance of Moisture Barriers
Moisture is the enemy of wood flooring. Before laying down the underlayment, it’s essential to install a moisture barrier to prevent any moisture from the subfloor from damaging your beautiful new floor. Moisture barriers are typically made of plastic sheets and help to create a waterproof barrier underneath the flooring.
3. Laying Down the Underlayment: A Protective Layer
Once the subfloor is prepared, the underlayment is rolled out and secured to the subfloor. It is crucial to keep the underlayment seams aligned and to provide a smooth transition between sections. This step serves as a vital buffer and creates a sound-absorbing cushion.
4. The Click-and-Lock Installation: A Tidy Puzzle
The final step is installing the flooring boards using the click-and-lock system. Start in a corner of the room and work your way outward, ensuring each board is securely locked into place. This process requires patience and precision, but the satisfaction of seeing the floor come together is worth the effort. Always leave a small expansion gap (typically around ⅛ inch) between the flooring and the walls to allow for movement.
Challenges and Considerations
1. Movement and Expansion: The Floating Floor’s Flexibility
The ability to expand and contract with changes in temperature and humidity is a key characteristic of floating floors. While this flexibility is essential for preventing warping and buckling, it can also pose challenges during installation. Ensure the expansion gap around the perimeter of the room is sufficient to accommodate movement, and avoid anchoring the flooring to walls or other fixed objects.
2. Transitions and Thresholds: Seamless Integration
When installing floating floors in multiple rooms, transitions between different flooring types or elevations require careful attention. For seamless integration, use transition strips or thresholds to create a smooth and even flow between different floor levels. These transitions play a crucial role in maintaining the aesthetic appeal and functionality of the flooring.
3. Repairing and Maintaining a Floating Floor
Unlike traditional nailed-down floors, repairing a damaged floating floor can be more challenging. Replacing a damaged board may require removing a section of the existing flooring, which can be time-consuming and potentially disrupt the overall flooring system. Regular cleaning and maintenance, such as vacuuming and mopping, are essential for preserving the beauty and longevity of your floating floor.
Can You Nail Down A Floating Floor
https://youtube.com/watch?v=Hs44NK_zhZo
In Conclusion: Embracing the Floating Floor Concept
Floating floors offer a unique blend of aesthetic appeal, comfort, and practicality. While they may seem like a simple and straightforward flooring option, understanding the principles behind their installation and maintenance is crucial for ensuring a successful and long-lasting flooring solution. By embracing the concept of a floating floor and following the guidelines outlined in this article, you can enjoy the unique benefits this flooring offers. Remember, a well-installed floating floor seamlessly blends form and function, adding a touch of elegance and durability to any home.


